Document-based reviewer guide
Human reviewers validate classification and extraction data in Flow Review.
Your core task as a reviewer is to check and correct data from automated document processing workflows. Depending on how your organization configures these workflows and manages reviews, your review assignments can vary. For example, you might be responsible for validating document classification after a single workflow checkpoint. Or you might need to validate both classification and extraction results, at multiple checkpoints and across various workflow queues.
Working in the Flow Review interface
Understanding the Flow Review interface can help you quickly process reviews.
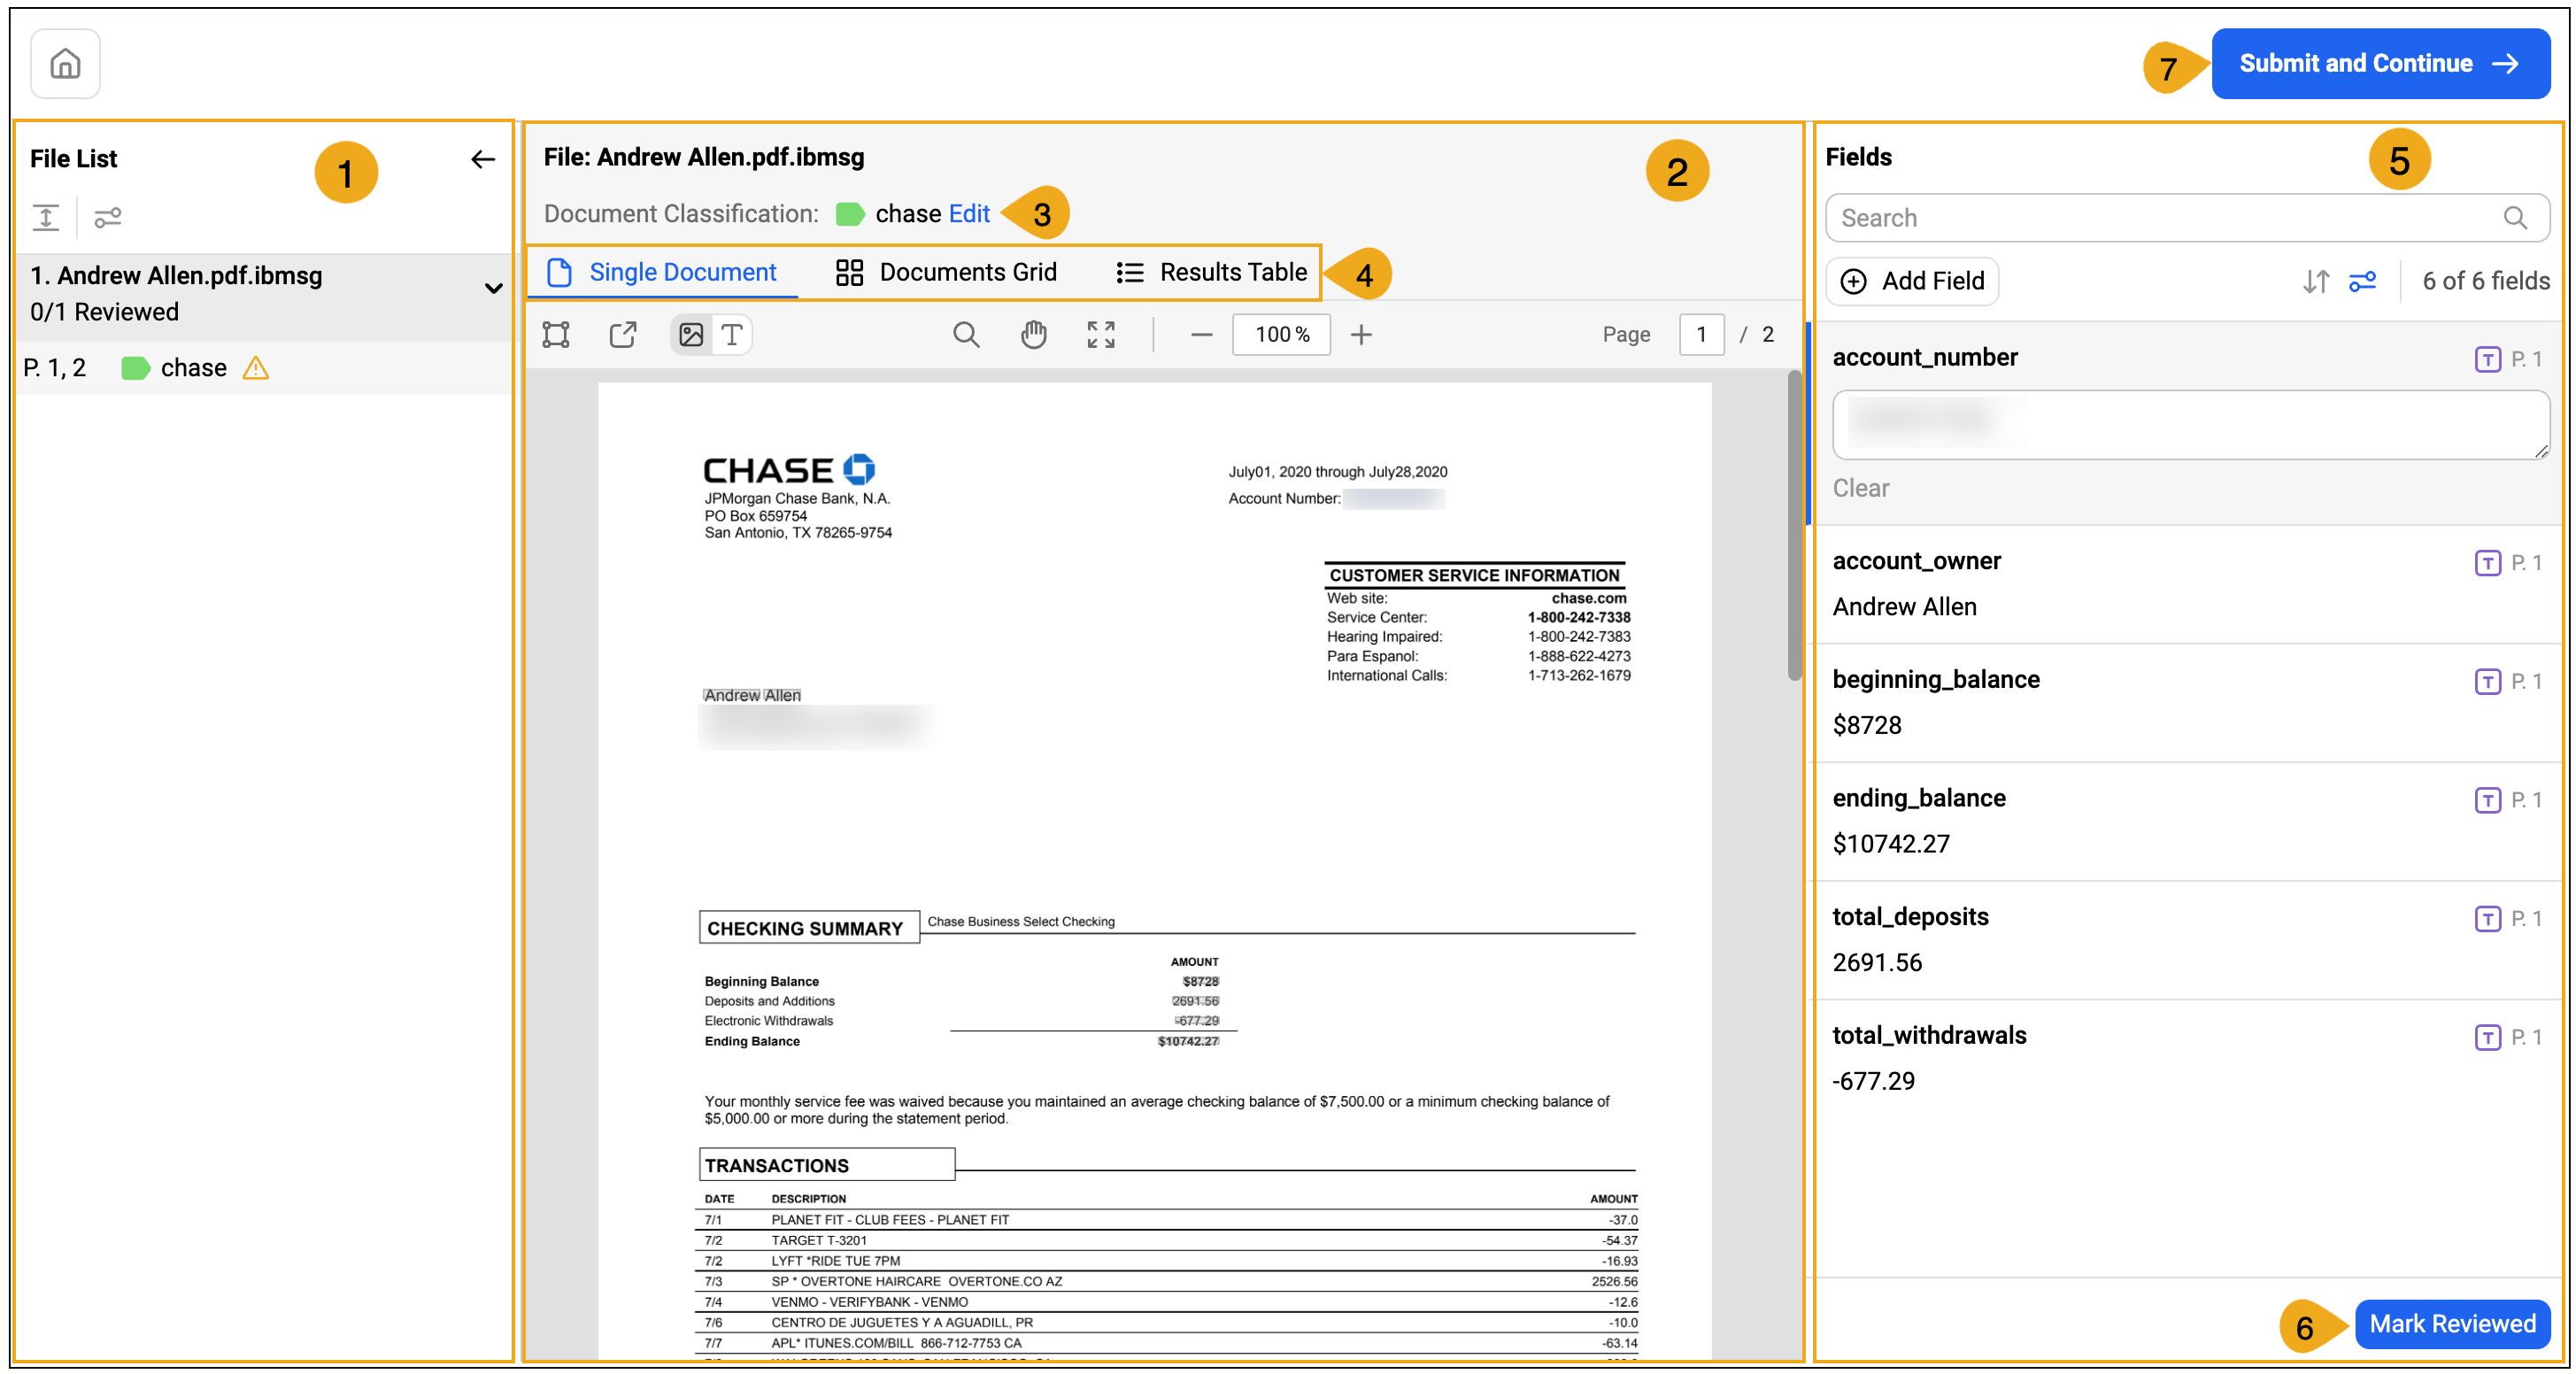
The Flow Review interface includes these components.
-
File list. The file list displays details about the files under review. If the queue you’re assigned to processes multipage files, each file might include multiple documents.
-
Document view. Displays the document selected in the file list. Use the pop-out icon to open the document in a separate window.
-
Document classification label. If the flow includes classification, a label displays the class of the document, along with an Edit link to modify classification.
-
Document view tabs.
-
Single Document. Use this view to modify extraction data. For documents belonging to only one class, you can also use this view to modify classification data.
-
Documents Grid. For files that contain multiple documents, use this view to modify mapping and classification data. The grid lets you move pages into the correct document and modify document class.
-
Results Table. For files that contain multiple documents, use this view to modify or compare extracted data across all documents.
-
-
Fields list. The fields list displays fields associated with the displayed document. You can add, sort, and filter fields. For example, you can filter to display only fields with errors. Fields with provenance—information about where the data is found in the file—display a P.
NoteDocuments don’t display extracted fields if the current checkpoint doesn’t include extraction. For example, if a review is triggered after mapping and classifying documents only, there is no extraction data to review. Similarly, if extraction data was reviewed at a previous checkpoint, you aren’t asked to review the data again.
-
Mark Reviewed button. Click to mark the document as reviewed. All documents in the flow job must be marked as reviewed before the flow can be resumed.
-
Submit and Continue button. Click to mark all of the documents in the file list as reviewed and advance to the next review available to you.
See Help > Keyboard Shortcuts for a list of hotkeys that can help you process reviews more quickly.
Reviewing documents
Depending on your organization’s review strategy, you might be automatically assigned documents in a round-robin fashion, manually assigned reviews by a review manager, or you might be able to self-select reviews.
-
From the Flow Review dashboard, select the Documents tab, then click Start Reviewing.
-
For each document you’re reviewing, verify and correct data if needed, then mark the document as reviewed. Alternatively, if the document needs additional review and an escalation queue is configured, click Escalate document.
-
To correct mapping data where multipage files were incorrectly parsed into individual documents, select the Documents Grid tab. Select pages and use the button controls to move or delete pages or create additional documents.
-
To correct classification data, use one of these methods:
-
For documents belonging to only one class, on the Single Document tab, by the classification label, click Edit. Select the correct document class, then click Confirm.
-
For files that contain multiple documents, select the Documents Grid tab. Next to the classification label on an incorrectly classified document, click Edit. Select the correct class, then click Confirm.
TipChanging the classification of a document clears any extracted data, resulting in a new set of blank extraction fields appropriate to the class you specify. Use the Schema for Reclassified Document options to specify whether to apply the fields from the most recent extraction or refiner step, or from all previous steps.
-
-
To correct extraction data, on the Single Document tab, in the fields list, select a field, then in the document viewer, select the area of the document that contains the information for that field. You can click to select text, or use your mouse to draw a box around the information.
TipFields are automatically revalidated when you navigate away from the selected document.
-
To correct table extraction data, on the Single Document tab, in the fields list, click the edit icon for any tables you need to correct. Select any table cell, then in the document viewer, select the area of the document that contains the information for that cell. You can click to select text, or use your mouse to draw a box around the information.
-
-
Click Submit & Continue.
You’re advanced to the next document available for review.